Summer Stone Fruit

Arguably the best part of the hot Summer months is the weekly trip to our local Farmer’s Market. Seeing familiar faces, interacting with growers, and picking up produce that was picked that morning, makes 90 degree weather almost bearable.

With such high temps this year, I’ve noticed that we are seeing a lot of fruits reach the market earlier than expected and in fantastic form. Last weekend, I had my eye on a basket full of stone fruit that I didn’t expect to even be edible before August! Much to my surprise, these beauties were plump, juicy and ripe for the picking.

Farmer's Market Stone Fruit

There were peaches, plums, nectarines, apricots and my personal favorite, pluots. If you’ve never had the opportunity to eat a ripe pluot, you are missing out on a delicious hybrid fruit. A cross between an apricot and a plum, a pluot carries the best traits of each fruit and presents itself with just the right amount of tart and tang, but irresistibly sweet flesh.

I find that when you stumble upon truly fresh fruit, it should be left unadulterated. So this recipe keeps the fruit at the forefront and keeps your prep time at a minimum. Feel free to omit the mint syrup, it just adds an extra dimension to the dish. If you have fragrant fruit, they can stand alone on your table!

Peach Salad

Summer Peach Salad

Yield: 6 servings

Ingredients:
6-8 full size stone fruits (peaches, nectarines, plums, apricots, pluots, etc.)
1/4 c. boiling water
1 T. honey
1 bunch fresh mint

Method:
1. Fire up your grill to high heat. Be sure to clean the grates from any leftover grilling and oil the grates. You can also use a stove top grill pan or a non-stick skillet (you just won’t get those beautiful grill lines!).
2. Prep your fruit by slicing into thick wedges and removing the pits.
3. Grill each side of the fruit just long enough for grill marks to form, then set aside in a large bowl.
4. Combine your boiling water and honey, then stir to dissolve the honey completely.
5. Add the bunch of mint to the hot water and allow to steep for 5 minutes, or just long enough to release it’s flavor.
6. Remove the mint from the syrup and allow it to cool slightly.
7. Drizzle the mint syrup over the fruit and toss to coat.
8. Serve in a large bowl and garnish with mint sprigs (if desired).

Notes:
1. The fruit in this recipe doesn’t even have to be grilled – if you are short on time, make the syrup ahead and store in the refrigerator. When you have some ripe fruit on hand, just slice it, toss with the cold syrup, and serve.
2. I am not a fan of leftovers, but these make a great yogurt topping the next day. Store some in the refrigerator, combine with some Paleo granola, and top your favorite yogurt.

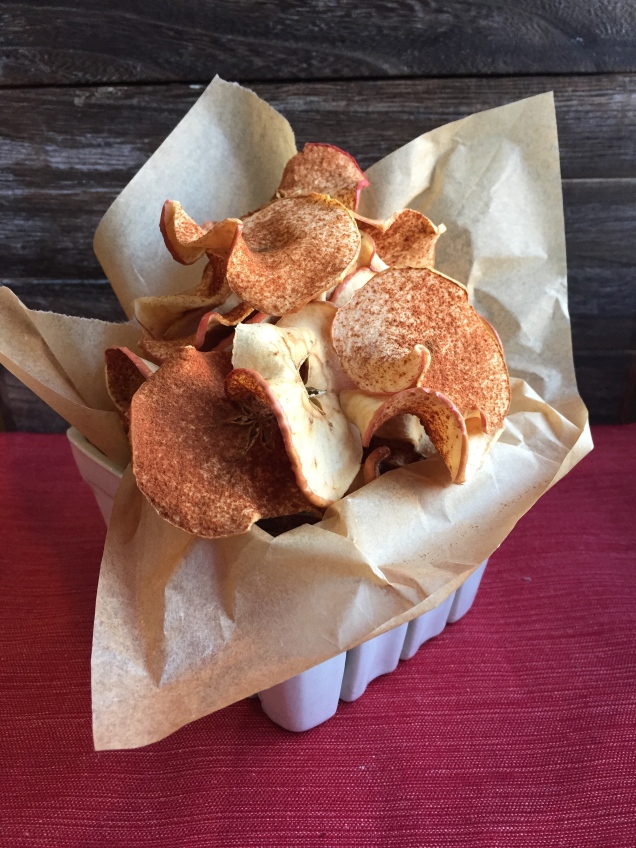
Paleo Cinnamon Apple Chips

Cinnamon Apple Crisps
Want a nearly hands-off, two ingredient, delicious snack? Cinnamon apple chips are the perfect answer to the need for easy to create, healthy snacks that require little effort. If you own a dehydrator, this will be even less time-consuming. Since most people only have an oven, this recipe is designed with that in mind. They do need to “dehydrate” for a few hours, so throw them in the oven on a day you know you’ll be home for a while, and let them do their thing.

Yield: about 50 chips
Ingredients
3 large, sweet apples (I like Pink Lady or Honeycrisp)
Cinnamon

Method
1. Preheat the oven to 200ºF. Line two sheet pans with parchment.
2. Wash your apples thoroughly. Slice them thinly on a mandolin or with a knife (I like around 1/16 of an inch).
3. Lay the apples on the prepared sheet pans in a single layer, being sure not to overlap.
4. Sprinkle them with as much cinnamon as you’d like. I’m a cinnaholic, so I go to town. You don’t have to be as generous.
5. Put them in the oven to dehydrate. Flip them half-way through.
6. When they are completely dry, allow to cool and store in a zip-top bag.

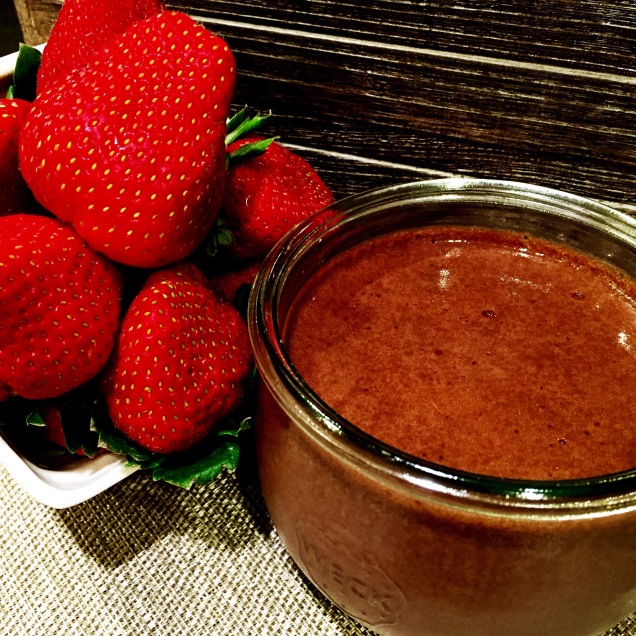
Paleo Chocolate Coconut Creme

Chocolate Coconut Creme

A piece of fruit is a great option for a sweet Paleo snack, but sometimes a cup of berries just isn’t going to cut it. Add a bowl of chocolate into the mix and we’re moving in the right direction. This Paleo take on classic chocolate fondue hits the spot and satisfies those annoying sweet cravings. It’s foundation is coconut milk, so it’s dairy-free and sweetened with honey. Kids love it and they can choose a variety of dippers – strawberries, bananas, or even Paleo chocolate chip cookies (a revelation stumbled upon by my husband).

If you want to make a batch for a party, you can reserve half of the cooked creme and omit the cocoa powder for a strictly vanilla coconut version. A duo of dips always seems more complicated, but it’s really just a matter of leaving out an ingredient!

Yield: 16 oz.
Ingredients
2 cans coconut milk (14 oz. each)
1/2 c. honey
1 oz. cocoa powder
2 T. vanilla

Method
1. Combine coconut milk and honey in a medium sized heavy-bottom saucepan.
2. Bring to a full boil, then reduce heat to low.
3. Stirring occasionally, cook 40-60 minutes, or until it has reduced by nearly half and is the consistency of thick cream.
4. Whisk in cocoa and vanilla, stirring to combine.
5. Taste and add honey if it isn’t to your desired sweetness.

Paleo Raspberry Lemonade Gummies

Paleo Gummies
The benefits of gelatin are preached throughout the Paleo community. It boasts some fantastic health properties and is a great source of protein. It’s also the ingredient responsible for setting Jell-O, giving marshmallows their iconic texture, and the ever-popular gummy bear. Of course, none of these are standard in the Paleo lifestyle. The good news is that you can make most of these treats Paleo-friendly.

Gelatin
A great way to get some extra protein in your diet and reap the benefits of the amino acids found in gelatin is with these delicious little gummies. They taste just like a pop of raspberry lemonade and are a handy treat to have around when the sugar-cravings start to hit. These aren’t overly sweet and rely heavily on the natural sugars found in the fruit you use. Honey is included in the list of ingredients, but it can be adjusted based on the sweetness of your berries.

Nearly any fruit can be substituted for the raspberries, just be sure to keep the liquid volume the same in order for the gelatin to properly set. Frozen berries are a good option as they are picked at the peak of ripeness, flash frozen, and are generally less expensive than fresh produce. Just be sure to choose the product that doesn’t have any added sugar.

To make fun shapes, you can use any silicone mold. I love these tiny little heart molds from Amazon. They are the unique ones pictured here and are the perfect size to showcase these gummies. Alternatively, you can pour the mixture into a sheet pan lined with plastic wrap and cut out squares or other shapes.

Yield: 60 gummies (1/2 ounce each)
Ingredients
10 oz. package frozen raspberries
15 oz. lemon juice
1/2 c. powdered gelatin
1/2 c. honey

Method
1. Line your silicone molds on a sheet pan that will fit in your refrigerator. Or, just make sure there is room in your fridge to place them individually.
2. Combine the raspberries and lemon juice in a blender. Blend until the mixture is completely smooth.
3. Reserve 1 cup of the liquid in a large bowl. Sprinkle the gelatin evenly over the liquid in the bowl and allow it to bloom for 5 minutes.
4. While the gelatin is softening, pour the remaining liquid mixture into a medium-sized saucepan. Add the honey.
5. Heat on medium-high until the honey has dissolved and the liquid is simmering.
6. Remove from heat, add the gelatin liquid mixture and whisk thoroughly. Be sure to dissolve all of the gelatin.
7. Strain the mixture through a fine sieve to remove all of the seeds and any gelatin that has clumped together.
8. Portion evenly into your desired molds.
9. Refrigerate at least 2 hours to allow to set completely.
10. Store in an airtight container and enjoy!

Chocolate Bacon

This post really needs no introduction. Chocolate is delicious and in the right composition, has some great health benefits (so says the Cleveland Clinic). Bacon is, well, yummy. I’ve tried my hand at curing my own bacon and it’s surprisingly easy – there will be a post about that at a later date. If you aren’t up to the task, that’s not a problem. There are quite a few great options out there and some are better than others. Mark Sisson has a great post about the Paleo bacon discussion, so check it out for a quick guide to making the best choice.

Now, on to the main attraction…

ChocolateBacon
Ingredients
1 lb. bacon
9 oz. dark chocolate (at least 70%)

Method
1. Preheat the oven to 400ºF. Line a sheet pan with parchment or a metal rack.
2. Lay the bacon out in a single layer on the prepared sheet pan. Depending on the thickness of your bacon, you may need more than one pan.
3. Cook the bacon for about 20 minutes, or until it is cooked through and crispy. You don’t want floppy bacon here!
4. Remove from the oven and drain on paper towels (if you didn’t use a metal rack). Allow to cool completely.
5. Break up your chocolate (or chop it up) and put it in a tall, microwave-safe dish. The taller, the better, as you’ll get better coverage when you dip the bacon. I like to use a tall coffee mug.
6. Microwave on high in 30 second intervals, stirring in between interval. Don’t let it heat for too long or the chocolate will burn.
7. Lay out some parchment or wax paper on a sheet pan for your final product.
8. Dip each piece of bacon in the chocolate – as far down the length of the bacon as you’d like. I usually go about halfway, so there’s a little bacon handle to hold on to!
9. Shake any excess chocolate off the bacon and back into your chocolate reservoir. Lay the bacon on the prepared sheet pan to dry. Complete all strips of bacon.
10. You should have some chocolate leftover. You can pour it out onto a sheet of parchment to cool and harden. Then break it up for some bacon-flavored chocolate for your Paleo Movie Mix!
11. Store in an airtight container in the refrigerator for up to 5 days.


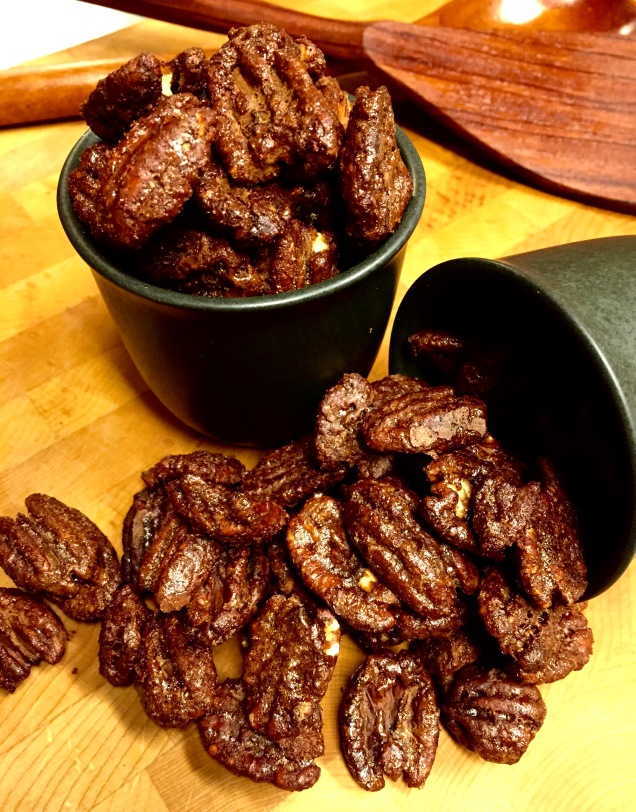
Candied Pecans

Raw Pecans
After over a year of adopting a Paleo lifestyle, I still struggle with sugar cravings. Granted, I don’t indulge myself like I used to – cookies, snacks and candies don’t have a place on my pantry shelves any more. Sometimes though, you just need a little something to curb the craving and it will pass.

These little pecan gems do just the trick. They are crunchy, slightly sweet, and full of warm spicy flavor. They remind me of pecan pie – without all of the guilt. You can adjust the seasonings to your liking, but keep in mind, after they bake, the spices will mellow. Keep a container of these in your desk drawer so when the 2 o’clock craving hits, you have something handy that you won’t regret later.

Spices
Yield: 4 cups

Ingredients
4 cups pecan halves
3 ea. egg whites
1/2 cup honey, slightly warmed
1 T. cinnamon
2 t. ground ginger
1 t. ground cloves
1 t. salt

Method
1. Preheat oven to 325ºF. Line a large sheet pan with parchment paper.
2. Set aside pecans in a large bowl.
3. Whisk together the whites and honey in a small bowl, just to combine.
4. Add all of the spices and salt, whisking again to combine.
5. Pour the egg white mixture over the pecans and toss to coat completely.
6. Spread the pecans out evenly on the parchment-lined sheet pan.
7. Roast in the oven for 30-40 minutes, checking often to ensure they don’t burn. They will still be slightly tacky to the touch, but will have a fully roasted color.
8. Remove from the oven and allow to cool completely. Once cooled, they will no longer be tacky to the touch. Store in an airtight container.

Candied Pecans

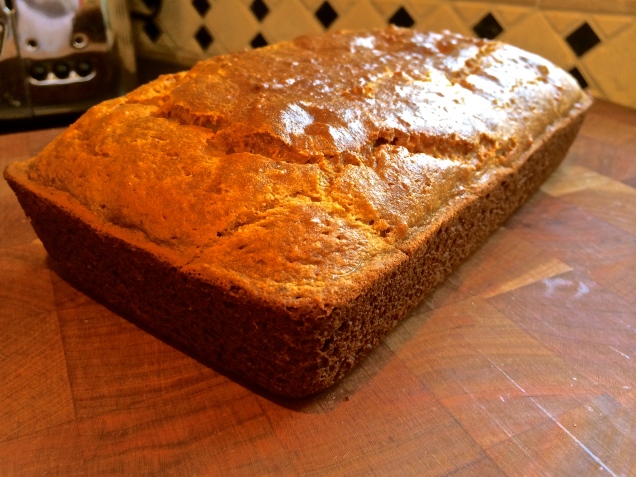
Paleo Almond Flour Bread

IMG_1219

Bread is probably one of the most commonly attempted Paleo “cheat” foods. It’s completely eliminated in a strict Paleo lifestyle, but we just can’t seem to live without its chewy goodness. I’m a HUGE bread fan, especially artisan sourdough bread. Unfortunately, I haven’t yet figured out how to capture the crunchy exterior and tender crumb of a San Francisco sourdough. Don’t worry, I’m making it my life’s mission.

In the meantime, I’ve realized that making a standard almond flour bread that is Paleo-friendly isn’t difficult. With a few simple ingredients and a couple of bowls, you’ve got yourself a moist batter that can be baked off in a flash. The uses for this bread are endless, including pain perdu (French toast), grilled cheese, and your everyday sandwich. It even makes great croutons, covered in herbs and parmesan – they are mouth-watering.

Ingredients
8.5 oz. almond flour
3/4 oz. coconut flour
1.5 t. baking soda
1/4 t. salt
2 oz. coconut oil
2 oz. butter
1 T. honey
5 ea. eggs
2.5 oz. applesauce

Method:
1. Preheat oven to 350ºF. Lightly grease a loaf pan with the fat of your choice (butter, pan spray, coconut oil, etc.).
2. Combine the flours, soda and salt in a large bowl. Sift to combine.
3. Combine the coconut oil, butter and honey in a small dish. Heat until melted. Cool slightly.
4. Combine eggs and applesauce in another bowl. Whisk to combine.
5. Stream oil & honey mixture into eggs. Whisk to combine.
6. Mix wet ingredients into dry and stir until completely combined.
7. Pour batter into greased loaf pan. Bake 30-40 minutes, or until a toothpick inserted comes out clean.
8. Allow the loaf to cool for a few minutes in the pan, then turn onto a cooling rack to cool completely.

IMG_1220

Notes:
1. You can also use all coconut oil instead of using butter if you want a completely dairy-free version.
2. Fold in some dried herbs and minced garlic for a fantastic addition to any weeknight dinner.
3. The applesauce just adds moisture, you can also add creme fraiche.